Trapezoidal thread processing method
The processing method of trapezoidal threads needs to be selected based on thread accuracy, pitch size and production batch. Its processing difficulty is higher than that of triangular threads, mainly reflected in the deep tooth profile, large cutting force, and easy vibration. Commonly used processing methods include low-speed turning, high-speed turning, milling and grinding. Each method has its own scope of application and process points. The processing quality must be guaranteed through reasonable tool selection, parameter setting and operating specifications.
Low-speed turning is the most commonly used method for trapezoidal thread machining. It is suitable for single-piece, small-batch production and threads with a larger pitch (P ≥ 6mm). High-speed steel tools (such as W18Cr4V) are used at a cutting speed of 5-10 m/min. The thread profile is gradually formed through multiple passes. The key to low-speed turning is the layered removal of stock. For rough turning, either the left-right or layered cutting method is used. The left-right cutting method uses a small slide to adjust the tool to cut both sides of the thread, moving the tool 0.1-0.2mm laterally after each feed to avoid excessive force on one side of the blade. The layered cutting method involves cutting radially along the thread, with each layer cutting 0.3-0.5mm deep until it approaches the thread profile height. This method evenly distributes cutting forces and reduces workpiece deformation. For finish turning, the tool head width is replaced with a tool tip width equal to the tooth groove base width, and the rake angle is set between 0° and 5° to ensure thread profile accuracy. The pitch diameter is controlled by fine-tuning the center slide. Finally, the thread profile angle is checked with a template to ensure a 30° error within ±15°. The advantages of the low-speed turning method are low tool cost and flexible operation. The disadvantage is low efficiency. It is suitable for threads with medium precision requirements (grade 6 and 7).
High-speed turning is suitable for mass production and trapezoidal threads with a small pitch (P ≤ 4mm). Using carbide tools (such as YT15 and YG8), cutting speeds of 30-60 m/min are possible. High speeds and low feed rates improve machining efficiency. High-speed turning requires specialized carbide tools for trapezoidal threads. The cutter body is forged from 45 steel, with the insert welded to the shank. The rake angle is -5°-0°, the relief angle is 6°-8°, and the tool tip radius is 0.2-0.3mm to enhance cutting edge strength. Rough turning utilizes a straight-in method with a crossfeed rate of 0.1-0.2 mm/r and a depth of cut of 1-2 mm, leveraging the carbide’s wear resistance to rapidly remove stock. Finish turning utilizes an oblique cutting method, with the tool feeding at a 3°-5° angle along one side of the thread to minimize contact between the tool and the workpiece, lowering cutting temperatures and enabling surface roughness to be controlled below Ra 3.2μm. High-speed turning requires a lathe with good rigidity, spindle radial runout ≤ 0.01mm, and tool holder clearance ≤ 0.03mm to avoid tooth profile errors caused by vibration. At the same time, sufficient cutting fluid (extreme pressure emulsion concentration 10%) must be used to directly cool the cutting area through a high-pressure nozzle (pressure 5-8MPa) to prevent tool overheating and wear.
Milling is suitable for mass-produced trapezoidal threads, especially for long lead screw parts. Thread milling machines or CNC milling machines are used to form the thread profile by rotating the milling cutter and synchronously feeding the workpiece. Milling methods are categorized into disc milling and comb milling. Disc milling is suitable for large-pitch threads. The milling cutter has a diameter of 100-150mm and 3-4 teeth. The full profile is milled through multiple passes, with a feed rate of 0.1-0.3mm/rev per revolution and a milling speed of 80-120m/min. Comb milling is suitable for fine-pitch threads. The milling cutter width is greater than the thread length, and processing can be completed in a single pass. This method is 5-10 times more efficient than disc milling, but the profile accuracy is slightly lower (profile error ≤ 0.05mm). Milling cutters are typically made of high-speed steel or carbide. High-speed steel cutters are suitable for low-speed fine milling, while carbide cutters are suitable for high-speed rough milling. After milling, deburring is required, and the top and bottom of the threads are polished with a fine file or oilstone. Milling offers the advantages of high efficiency and low labor intensity, making it suitable for mass production of medium- and low-precision threads (grades 7 and 8).
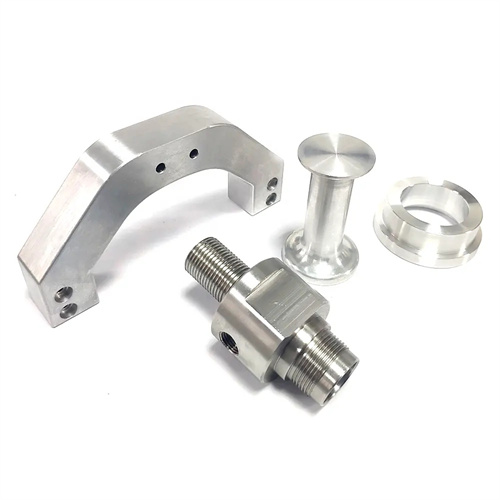
Grinding is the primary method for high-precision machining of trapezoidal threads, suitable for threads with precision grades 5 and above (such as machine tool lead screws). Using a thread grinder, the relative motion of the grinding wheel and the workpiece creates a precise thread profile, achieving surface roughnesses of up to Ra 0.4-0.8μm and a pitch diameter tolerance of 0.01-0.03mm. Grinding methods include single-thread and multi-thread grinding. Single-thread grinding wheels offer high precision, grinding each tooth individually through axial feed, making them suitable for precision threads. Multi-thread grinding wheels offer high efficiency, with the wheel shape consistent with the thread profile, allowing for a single-step grinding process, making them suitable for mass production. The grinding wheel material is selected based on the workpiece material: white corundum (WA) wheels are used for grinding steel, while black silicon carbide (C) wheels are used for grinding cast iron. The grinding wheel grit should be 60#-80# and have a medium-soft hardness (KL grade) to ensure sharpness. During grinding, the grinding wheel speed (1500-3000r/min) and the workpiece speed (10-30r/min) need to be controlled. Use drip lubrication or oil mist lubrication to avoid grinding burns. The grinding allowance for each pass is 0.02-0.05mm, and the final accuracy is achieved after 3-5 grinding passes.
Quality control for trapezoidal thread machining focuses on the pitch diameter, thread angle, and surface quality. The pitch diameter is measured using the three-needle method, using a gauge needle with a diameter of d0 = 0.518P (e.g., d0 = 3.108mm for a P = 6mm). The distance M to the outside of the gauge needle is measured with a micrometer. The actual pitch diameter is calculated using the formula M = d2 + 4.864d0 – 1.866P. Errors must be kept within tolerance. Thread angle inspection is performed using a tool microscope at 10-20x magnification, observing the thread profile and comparing it to a standard sample. Deviations must be ≤ ±10′. Surface quality is inspected visually and using a roughness tester. Defects such as burns, cracks, and burrs must be avoided. For transmission threads, the cumulative pitch error (≤ 0.02mm/100mm) and the thread half-angle error (≤ ±15′) must also be checked. If thread profile asymmetry occurs during machining, the tool angle must be adjusted or the tool must be recalibrated. If the mean diameter exceeds tolerance, the depth of cut can be fine-tuned to correct the problem. If the surface roughness exceeds the standard, the tool must be replaced or the cutting speed reduced. Strict process control and quality inspections ensure the transmission accuracy and service life of the trapezoidal thread.
