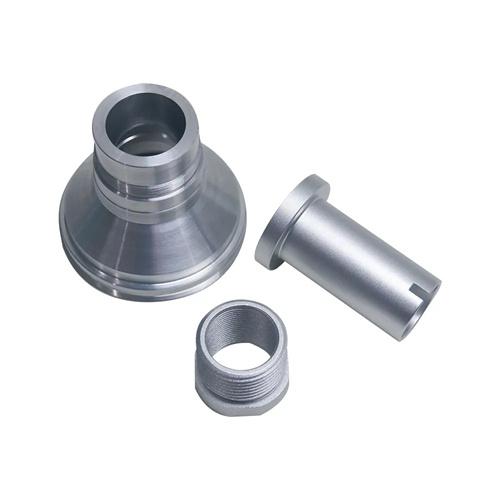
Worm turning and measuring methods
A worm is a key component for transmitting intersecting axis motion and power. It forms a worm drive mechanism in conjunction with a worm wheel, boasting a high transmission ratio, compact structure, and smooth operation. It is widely used in machine tools, lifting machinery, textile machinery, and other equipment. Worms have a helical tooth profile and can be categorized as Archimedean worms, involute worms, and normal straight flank worms. Archimedean worms are the most widely used due to their simple turning process. The difficulty in worm turning lies in ensuring tooth profile accuracy, pitch precision, and surface quality. This requires careful tool selection, clamping method, and cutting parameter control. Accurate measurement is crucial for verifying machining quality.
The tool selection for worm turning must match the worm’s tooth profile. The Archimedean worm’s tooth profile is straight in the axial cross-section. The tool tip angle should be equal to the worm’s tooth profile angle (typically 20°). This can be calibrated using an angle template, with an error within ±10°. For rough turning, use a high-speed steel turning tool (such as W18Cr4V) with a tip width less than the worm’s tooth groove width and a rake angle of 10°-15° to reduce cutting forces. For finish turning, use a carbide turning tool (such as YT15) or a high-speed steel finishing tool with a rake angle of 0°-5° to ensure tooth profile accuracy. The cutting edge should be polished with an oilstone to a surface roughness of ≤ Ra0.4μm. Worm turning tools must be strictly aligned, with the tool tip at the same height as the worm axis, with a deviation of ≤0.02mm. Otherwise, tooth profile asymmetry can be achieved. This can be adjusted using a trial cut: turn a shallow groove on the workpiece’s outer diameter and measure the groove depth to ensure equal depth on both sides. If not, adjust the tool height until symmetry is achieved.
The clamping method for worm turning must ensure workpiece rigidity and rotational accuracy. For shorter worms (≤300mm), double-thimble clamping is used. The center holes at both ends must be ground to H6 precision, and the tailstock center should use a live center to reduce frictional heat. Longer worms (>300mm) require additional steady rest support. The steady rest’s two support blocks are symmetrically located on either side of the worm, and the contact pressure with the workpiece is controlled at 0.5-1MPa to prevent workpiece bending and deformation. Before clamping, the workpiece must be corrected for radial runout (≤0.03mm) and axial play (≤0.02mm). For stepped worms, a reference journal must be machined first, and then used for positioning and clamping to ensure coaxiality (≤0.02mm) of each worm segment. The workpiece extension should be kept as short as possible, generally no more than five times the diameter. A steady rest should be used for auxiliary support if necessary to improve machining stability.
The cutting parameters for worm turning require phased optimization. Rough turning prioritizes stock removal, using a large depth of cut and a low cutting speed. For worms with a module m = 2-5mm, a cutting depth of 1-2mm, a cutting speed of 8-15m/min (for high-speed steel tools) or 30-50m/min (for carbide tools), and a feed rate of 0.1-0.2mm/r. Finish turning requires ensuring tooth profile accuracy and surface quality. A cutting depth of 0.1-0.3mm, a cutting speed of 10-20m/min (for high-speed steel tools), and a feed rate of 0.05-0.1mm/r are used. Climb milling is employed to minimize friction between the tool and the workpiece. When turning multi-start worms, an indexing mechanism is required to ensure the phase difference between the threads of each start. For example, a double-start worm requires accurate 180° indexing. This can be achieved using a graduated dial on the lathe spindle or a dedicated indexing card, with an indexing error of ≤15°. The cutting fluid is an extreme pressure emulsion (concentration 8%-10%), which is directly sprayed into the cutting area through a high-pressure nozzle (pressure 3-5MPa) to reduce the cutting temperature and prevent the formation of built-up edge.
Worm measurement methods include both individual and comprehensive measurements. Individual measurements are used to determine key worm parameters, such as module, pitch, tooth profile angle, and pitch diameter. Module and pitch can be measured using a tool microscope. The pitch is the distance between corresponding points on two adjacent teeth in an axial cross-section. Module m = pitch P/π, with a measurement accuracy of up to 0.001mm. The tooth profile angle is measured using a tool microscope or projector. The worm tooth profile is compared to a standard sample, with a deviation of ≤±10′. The pitch diameter is measured using the three-needle method. A needle with a diameter of d0 = 0.577mm (m is the module) is used. A micrometer is used to measure the outer distance M of the needle. The pitch diameter d2 is calculated using the formula M = d2 + 3.924d0 – 1.374mm. The tolerance must be within the tolerance range (for example, the pitch diameter tolerance for a Grade 6 precision worm is 0.03-0.06mm). Comprehensive measurement uses a worm tooth thickness vernier caliper to simultaneously measure the worm’s normal tooth thickness and tooth height. This is suitable for rapid inspection, and the normal tooth thickness deviation must be within ±0.02mm. For high-precision worms (grade 5 and above), the cumulative pitch error (≤0.02mm/100mm) and the radial runout of the ring gear (≤0.01mm) must also be checked. Laser interferometers or helical inspection instruments are used for precise measurement. This scientific measurement method effectively verifies the worm’s machining quality and ensures proper meshing with the worm wheel.
