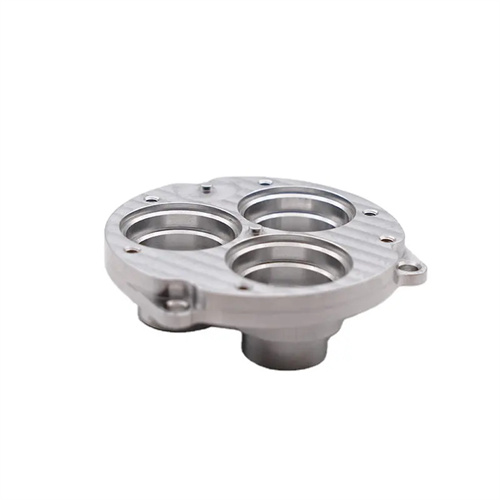
Machining inner conical surface
Machining an internal conical surface is a process that requires high precision in mechanical processing. Its processing quality directly affects the fitting performance and service life of the parts. The characteristic of the internal conical surface is that the aperture gradually changes from one end to the other, forming a certain taper. This structure is often used for detachable connections between shafts and holes, such as the fit between the machine tool spindle and the center, the sealing surface of the valve, etc. When turning an internal conical surface, it is first necessary to clarify the main parameters of the conical surface, including taper, cone half angle, maximum cone diameter, minimum cone diameter and cone length, etc. These parameters are the basis for ensuring the machining accuracy of the internal conical surface. Before processing, according to the requirements of the part drawing, the specific values of these parameters should be accurately calculated or consulted in relevant standards, and the machine tool and cutting tool should be adjusted based on this.
The main methods for turning internal conical surfaces include rotating the small slide, offsetting the tailstock, tracking, and broad-blade turning. Different methods are suitable for different machining conditions and precision requirements. The rotating small slide is one of the most commonly used methods. It rotates the small slide around a turntable by a certain angle (equal to the cone half-angle), allowing the turning tool to move along the generatrix of the conical surface, thereby turning the internal conical surface. This method is simple to operate and is suitable for machining internal conical surfaces of various tapers, especially those with larger tapers and shorter lengths. However, due to the limited travel of the small slide, this method is limited for machining longer internal conical surfaces. The offset tailstock method is suitable for machining internal conical surfaces with smaller tapers and longer lengths. By offsetting the tailstock, the workpiece’s rotation center forms a certain angle with the lathe spindle axis, thus turning the conical surface. However, this method requires precise calculation to adjust the tailstock offset and is only suitable for machining external conical surfaces and the internal conical surfaces of through-holes.
When turning internal conical surfaces, the selection and installation of the tool are crucial. Since the processing space of the internal conical surface is limited, the rigidity and size of the tool must be adapted to the processing requirements. Internal turning tools made of high-speed steel or carbide are usually selected, and the geometric angles of the tool should be reasonably designed according to the workpiece material and processing accuracy. The front angle and the back angle should be appropriately increased to reduce the cutting force and cutting temperature and avoid deformation of the workpiece; the main deflection angle and the secondary deflection angle should be adjusted according to the size of the taper to ensure that the tool can cut in and out smoothly. When installing the tool, it must be ensured that the tool tip is at the same height as the center of rotation of the workpiece, otherwise it will cause an error in the cone half angle, affecting the accuracy of the internal conical surface. In addition, the extension length of the tool should be as short as possible to improve the rigidity of the tool and reduce vibration.
The proper selection of cutting parameters has a significant impact on the quality and efficiency of turning the inner conical surface. The cutting speed, feed rate, and cutting depth are directly related to the cutting force, cutting temperature, and surface roughness. For plastic materials, such as low-carbon steel and aluminum alloys, higher cutting speeds and lower feed rates should be used to obtain better surface quality. For brittle materials, such as cast iron and cast steel, lower cutting speeds and higher feed rates should be used to reduce damage to the machined surface caused by broken chips. The cutting depth should be gradually adjusted according to the machining allowance and precision requirements of the workpiece. Generally, rough machining is performed first to remove most of the allowance, followed by semi-finishing and finishing to ensure the dimensional accuracy and surface roughness of the inner conical surface. At the same time, cutting fluid should be used reasonably. Cutting fluid can not only reduce cutting temperature and tool wear, but also flush away chips to prevent chips from clogging the inner hole and affecting machining quality.
Accuracy inspection of turned internal conical surfaces is the final step in ensuring machining quality. Common inspection methods include taper plug gauge testing, micrometer measurement, and template comparison. Taper plug gauge testing is the simplest and most common method. This involves inserting a plug gauge into the internal conical surface and observing the gap between the gauge and the surface to determine if the taper is acceptable. If the gauge inserts smoothly and makes uniform contact, the taper meets the requirements. If there is a gap or insertion is impossible, the machine tool or tool must be readjusted. Micrometer measurement is suitable for internal conical surfaces requiring high precision. By measuring the diameters of different sections, the actual taper is calculated and compared with the drawing requirements. Template comparison is suitable for verifying the cone half-angle. Fitting a template to the workpiece’s conical surface and observing the light transmission between them determines if the half-angle is acceptable. During the inspection process, if the internal conical surface accuracy is found to not meet the requirements, the cause should be promptly analyzed and appropriate correction measures implemented to ensure part quality.
