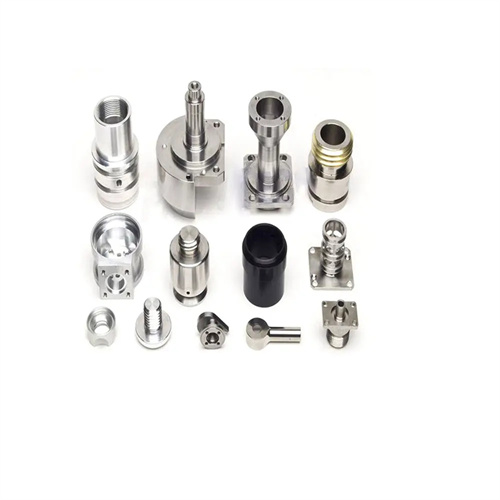
Machining of threaded workpieces
Threaded workpieces are basic parts widely used in mechanical manufacturing, including bolts, nuts, screws, pipe fittings, etc. Their turning processing needs to ensure the dimensional accuracy, form and position accuracy and surface quality of the threads to meet functional requirements such as connection and transmission. The turning characteristic of threaded workpieces is that there is a forced feed relationship between the tool and the workpiece during the processing (the feed amount is equal to the pitch or lead), so there are high requirements for the transmission accuracy of the lathe, the geometric parameters of the tool and the clamping method. Depending on the thread profile, common threaded workpieces include triangular threads, trapezoidal threads, rectangular threads and serrated threads. There are differences in the turning methods and process parameters of threads with different tooth profiles, and corresponding processing plans need to be formulated according to specific requirements.
The preparation work before turning threaded workpieces is crucial and directly affects the quality and efficiency of subsequent processing. First, it is necessary to select an appropriate turning tool based on the thread parameters (such as pitch, thread angle, and nominal diameter). The tool tip angle of a triangular thread turning tool should be equal to the thread thread angle (such as 60° for ordinary threads and 55° for pipe threads). The tool tip angle of a trapezoidal thread turning tool is usually 30°. The front and back angles of the turning tool need to be adjusted according to the workpiece material. When processing steel, the front angle is 5°-10°, and when processing cast iron, the front angle is 0°-5°. Secondly, the lathe ‘s transmission system needs to be checked to ensure that the transmission ratio between the screw and the spindle is accurate to avoid pitch deviation due to transmission error. For high-precision thread processing, the lathe’s feed box nameplate or the calculation of the pulley combination must be used to set the correct pitch. The clamping of the workpiece must be firm, reliable and accurately positioned. For short and thick workpieces, a three-jaw self-centering chuck can be used for clamping; for long and thin workpieces, one clamp and one thimble or double thimble clamping is required, and a tool holder or center stand is used for auxiliary support to prevent the workpiece from bending and deformation under the action of cutting force.
Machining triangular threads is the most common thread machining process, encompassing roughing, semi-finishing, and finishing. Roughing uses a larger depth of cut and lower cutting speeds, primarily to remove the majority of the machining stock. The number of tool feeds is determined by the thread pitch; a larger pitch requires more feeds. Roughing can employ either the side-to-side or oblique cutting methods. The side-to-side method continuously adjusts the tool’s lateral and longitudinal feeds to ensure uniform cutting on both sides of the cutting edge, making it suitable for threads requiring high precision. The oblique cutting method, in which the tool feeds along one side of the thread, offers high cutting efficiency but is prone to thread profile deviation, making it suitable for roughing. Semi-finishing requires reducing the cutting depth to correct for dimensional and form errors, keeping pitch errors within 0.05mm. Finishing uses a smaller depth of cut (0.05-0.1mm) and higher cutting speeds to ensure a surface roughness of Ra3.2μm or less. After finish turning, the pitch diameter of the thread should be checked with a thread gauge (plug or ring) to ensure it meets design requirements.
Trapezoidal and rectangular threads are relatively difficult to turn due to their deeper profiles and larger pitches, requiring specialized turning tools and machining methods. Trapezoidal thread turning tools are divided into roughing and finishing tools. Roughing tools have a narrower head width and a tool tip angle slightly less than 30° to reduce cutting forces. Finishing tools have a head width equal to the thread groove width and a tool tip angle of exactly 30° to ensure thread profile accuracy. Trapezoidal threads can be roughed using a layered cutting method, where the tool feeds a small distance horizontally and then moves longitudinally by one pitch, gradually turning the thread groove to the desired depth. This method evenly distributes cutting forces and reduces workpiece deformation. Machining rectangular threads is similar to trapezoidal threads, but due to their rectangular profile, the tool tip angle is 0°. During machining, the crest and root of the thread must be parallel, and the sides must be perpendicular to the axis. After roughing, the thread profile must be checked with a template. During finish turning, dimensional accuracy is controlled by measuring the major, minor, and pitch diameters of the thread.
Post-thread turning quality inspection is crucial for ensuring the performance of threaded workpieces. Inspection items include dimensional accuracy, form and position accuracy, and surface quality. Dimensional accuracy is verified using thread gauges. Standard threads are inspected with go and no-go gauges. Acceptance is achieved if the go gauge screws in smoothly and the no-go gauge fails to screw in or does not exceed 2-3 threads. Precision threads require a thread micrometer to measure the pitch diameter, or a tool microscope to measure parameters such as thread pitch and thread profile angle. Form and position accuracy inspection includes thread coaxiality and perpendicularity. This can be measured using a dial indicator or micrometer while rotating the workpiece on a lathe. Coaxiality error is generally controlled within 0.05mm. Surface quality is inspected visually or using a surface roughness tester. Threads must be free of defects such as cracks, burrs, and burns, and the surface roughness must meet design requirements. Minor defects (such as excessive surface roughness) can be repaired through grinding or fine turning. Severe defects (such as excessive pitch or incorrect thread profile) will result in scrapping. Through strict quality inspection, we ensure that threaded workpieces can meet the requirements of assembly and use.
