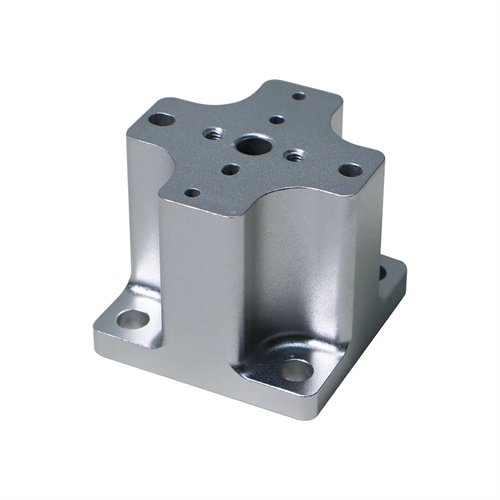
Machining of large tin bronze rectangular lead screw nuts
Large rectangular tin-bronze lead screw nuts are key transmission components in heavy-duty machine tools, presses, and other equipment. Typically made of ZCuSn10Pb1 (containing 10% tin and 1% lead), they exhibit excellent wear resistance, friction reduction, and castability, maintaining good lubrication properties under low-speed and heavy-load conditions. These nuts are characterized by their large size (inner diameter often exceeding 200mm, length 500-2000mm), thick wall thickness (10-30mm), and rectangular internal thread profile. These nuts also require high machining precision (thread pitch diameter tolerance IT7-IT8, surface roughness Ra ≤ 1.6μm). Machining these nuts presents challenges such as difficult clamping, high cutting forces, and poor heat dissipation, necessitating targeted process solutions to ensure machining quality.
Pre-turning preparation for large tin-bronze rectangular lead screw nuts is crucial. First, the casting blank must be aged to eliminate casting stresses. Low-temperature aging (200-250°C for 4-6 hours) is used to release residual stresses and reduce machining distortion. A visual inspection of the blank should ensure the absence of defects such as cracks and shrinkage cavities. Ultrasonic testing should be performed as necessary, particularly in the threaded area. Internal defects are not permitted. The machining process is tailored to the nut’s structural dimensions: rough turning the outer diameter and end faces → drilling through holes or boring the inner hole (leaving a 2-3mm allowance) → aging → semi-finish turning the outer diameter, end faces, and inner hole (leaving a 0.5-1mm allowance) → finish turning the outer diameter and end faces → rough turning the rectangular threads → finish turning the rectangular threads → final inspection. Nuts with flanges or steps require pre-machined reference surfaces (such as the flange end face) to position subsequent machining operations, ensuring positional accuracy (e.g., perpendicularity between the end face and the inner hole ≤ 0.03mm/100mm).
Internal turning is fundamental to large nut machining. Guaranteed dimensional accuracy and cylindricity are essential to provide a benchmark for subsequent threading. Rough boring uses a carbide boring tool (such as YG8) at a cutting speed of 50-80 m/min, a feed rate of 0.2-0.3 mm/r, and a cutting depth of 2-5 mm. Tin bronze’s excellent cutting properties are leveraged to quickly remove excess stock. Semi-finish boring uses a YG6 carbide tool at a cutting speed of 80-100 m/min, a feed rate of 0.15-0.2 mm/r, and a cutting depth of 1-2 mm to correct for internal hole shape errors. Finish boring uses a high-speed steel boring tool (W18Cr4V) at a cutting speed of 30-50 m/min, a feed rate of 0.05-0.1 mm/r, and a cutting depth of 0.3-0.5 mm, ensuring an internal hole surface roughness of Ra ≤ 3.2 μm. The dimensional accuracy of the inner hole must be controlled at H9-H10 level, and the cylindricity must be ≤0.015mm/100mm. It can be tested with an internal diameter dial indicator or a three-coordinate measuring machine. For nuts with a length exceeding 1000mm, multiple measurements are required during the boring process to prevent excessive inner hole taper due to tool wear.
Machining rectangular threads is a core process. Rectangular threads have a rectangular profile, a 0° profile angle, and flanks parallel to the axis, resulting in high transmission efficiency and high load-bearing capacity. Rough turning of rectangular threads is performed using a carbide turning tool (YG8). The tool head width is 0.5-1mm smaller than the thread groove width, with a rake angle of 10°-15° and a clearance angle of 6°-8°. A layered cutting method is used, with a depth of 0.5-1mm per layer, a lateral feed rate of 0.1-0.2mm/r, and a cutting speed of 50-70m/min. The thread profile is formed through multiple passes. Finish turning is performed using a high-speed steel turning tool with a tool head width equal to the groove width (tolerance + 0.02-0mm), a rake angle of 5°-10°, and a stone-finished blade. A straight-feed method is used at a cutting speed of 30-40m/min and a feed rate of 0.05-0.1mm/r. The surface roughness Ra on both flanks of the thread is maintained at ≤ 1.6μm. During turning, sufficient cutting fluid (a mixture of kerosene and engine oil in a 3:1 ratio) is required to cool and lubricate the tool and workpiece, preventing chips from adhering to the cutting edge and forming built-up edge, which can affect surface quality. For multi-start rectangular threads, an indexing device is required to ensure uniform distribution of the threads, with an indexing error of ≤0.05mm.
The clamping and deformation control of large nuts are difficult points in the turning process. Due to their large size and heavy weight (often exceeding 50kg), special fixtures and auxiliary supports are required. When turning the outer circle and end face, a four-jaw single-action chuck and a center stand are used for clamping. The four-jaw chuck clamps one end of the nut, while the center stand supports the other end. The jaws are adjusted so that the workpiece axis coincides with the spindle axis (radial runout ≤ 0.05mm). When turning internal holes and threads, reverse-jaw clamping or a special jig can be used. The clearance between the jig and the outer circle of the nut is 0.1-0.2mm, and bolts are used to evenly tighten the jig to avoid deformation caused by excessive local force. For thin-walled areas (wall thickness < 15mm), fan-shaped support blocks are required to increase the clamping area and reduce clamping deformation. The support blocks are made of cast iron, and copper sheets are attached to the contact areas with the workpiece to prevent surface scratches. During the machining process, the excess needs to be removed in stages. After rough machining, the part is left for 24 hours to allow the stress to be fully released before semi-finishing and finishing. After each machining, the key dimensions are measured and the subsequent cutting parameters are adjusted according to the deformation to ensure the final dimensional accuracy.
Quality inspections must cover dimensional accuracy, form and position accuracy, and surface quality. The inner diameter is measured using an internal micrometer or laser caliper, with a cross-section measured every 100mm. The tolerance must be within the H9 tolerance. The pitch diameter of rectangular threads is measured using a thread micrometer or three-needle measurement method, with a tolerance of IT7-IT8. The thread profile width is measured using a vernier caliper with a tolerance of ≤±0.03mm. Form and position accuracy checks include: perpendicularity between the nut end face and the inner hole (≤0.03mm/100mm), measured using a dial indicator rotating the end face one full revolution; and cylindricity of the inner hole (≤0.02mm/100mm), calculated through multi-point measurement. Surface quality is inspected visually and using a roughness tester. The thread surface must be free of scratches, burrs, burns, and other defects, with a roughness Ra of ≤1.6μm. Hardness testing (typically 60-80 HBW for tin bronze) and metallographic analysis are performed on critical areas to ensure the absence of work hardening or structural defects. Through strict process control and comprehensive quality inspection, the processing qualification rate of tin bronze large rectangular screw nuts can reach more than 95%, meeting the transmission needs of heavy equipment.
