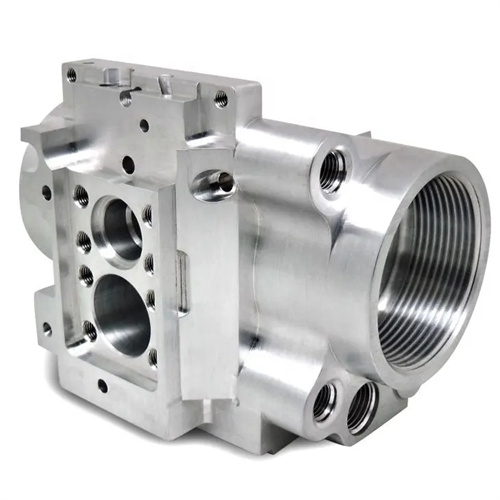
Whirling thread milling
Thread whirling milling is a highly efficient thread processing method. Multiple carbide cutters mounted on a high-speed rotating cutterhead perform a whirling motion around the workpiece, rapidly forming the thread. Its efficiency is 5-10 times that of conventional turning, making it widely used in the mass production of long threaded parts such as lead screws, screws, and drill rods. Whirling milling is characterized by high cutting speeds (the cutterhead can reach 100-300 m/min), high feed rates, and the ability to complete the threading process in a single pass. It is suitable for producing large pitches (3-30 mm) and long threads (1-10 m). However, it places high demands on both equipment and tools, requiring a dedicated whirling milling machine or a modified lathe, coupled with a precise drive system to ensure pitch accuracy.
The working principle of cyclone milling is based on the combined motion of the tool and workpiece. The cutterhead axis forms a certain helix angle with the workpiece axis (equal to the thread helix angle). The cutterhead rotates at high speed (the main motion), while the workpiece rotates slowly (moving one pitch per revolution, the feed motion). Simultaneously, the cutterhead feeds axially along the workpiece (the feed rate is equal to the pitch), and the tool cuts the thread profile on the workpiece surface. Depending on the relative position of the cutterhead and the workpiece, it can be divided into two types: internal cutting and external cutting. The internal cutting cutterhead has a diameter smaller than the workpiece diameter, and the tool cuts from the inside of the workpiece, making it suitable for machining internal threads or smaller diameter external threads. The external cutting cutterhead has a diameter larger than the workpiece diameter, and the tool cuts around the outside of the workpiece, making it suitable for machining large diameter external threads and providing good cutting stability. During cyclone milling, multiple tools are involved in cutting simultaneously, with each tool taking on a portion of the cutting load. This not only improves efficiency but also disperses cutting forces and reduces workpiece deformation. This is one of the reasons why it is suitable for machining slender threaded parts.
The tool system for cyclone milling is central to ensuring machining quality. It comprises the cutterhead, toolholder, and inserts. The selection of tool parameters directly impacts thread accuracy and surface finish. The cutterhead diameter is determined by the workpiece diameter. For externally cut cutters, the diameter is typically 2-3 times the workpiece diameter to ensure sufficient cutting space and tool rigidity. The cutterhead is evenly distributed with 3-6 tool positions, each equipped with a carbide insert. The number of inserts is determined by the thread pitch; a larger pitch requires more inserts (up to 6), ensuring a uniform cutting load across each insert. The insert material is typically ultrafine-grained carbide (such as WC-Co alloy with a Co content of 8%-10%), suitable for high-speed cutting. Coatings such as TiAlN or AlCrN are used to enhance wear and heat resistance. Insert geometry must match the thread profile, with a rake angle of 5°-10° and a clearance angle of 8°-12°. The tool tip radius should be less than half the thread root radius to avoid interference. When installing the tool, it is necessary to ensure that the height of each blade is consistent, with a deviation of ≤0.01mm. It can be calibrated by a special tool setting instrument. At the same time, adjust the angle between the axis of the cutter head and the axis of the workpiece to make it equal to the helix angle of the thread, with a deviation of ≤±5′.
The process parameters for whirling milling must be determined based on the thread parameters, workpiece material, and tool performance. These primarily include cutterhead speed, workpiece speed, feed rate, and depth of cut. Cutting speed is determined by cutterhead speed, typically ranging from 1000-3000 rpm, corresponding to a cutting speed of 100-300 m/min. Medium-low speeds (100-200 m/min) are used for machining steel, and medium-high speeds (200-300 m/min) are used for machining cast iron or non-ferrous metals. Workpiece speed is determined by the thread pitch and feed rate, calculated as nworkpiece = 1000vfeed/(p×πd) (where p is the thread pitch and d is the workpiece diameter). This range is typically 10-50 rpm, with a larger pitch resulting in a lower workpiece speed. The feed rate is equal to the thread pitch (for single-start threads) or lead (for multi-start threads) and must be precisely maintained by the machine tool’s transmission system, with an error of ≤0.01 mm. The cutting depth is determined by the thread height, and machining can be completed in a single pass. For threads with a pitch greater than 10mm, two passes are required: the first pass removes 2/3 of the stock, and the second pass finishes the workpiece to size. The cooling and lubrication system utilizes a high-pressure, high-flow cutting fluid (extreme-pressure emulsion, 10%-12% concentration) with a flow rate of ≥50L/min and a pressure of 2-3MPa. A ring-shaped nozzle surrounds the cutting area, forcing cooling of the tool and workpiece to prevent tool wear and workpiece burns caused by high temperatures.
Precision control and quality inspection for whirlwind milling focus on pitch accuracy, tooth profile accuracy, and surface quality, all of which directly impact the meshing performance and service life of the thread. Cumulative pitch error is a key metric. For a 1m thread, the error must be controlled within 0.1mm. This can be measured using a pitch meter or laser interferometer. Ten measurement points are evenly selected along the entire length of the thread, and the cumulative error is calculated. Tooth profile angle deviations ≤±15′ are measured using a tool microscope at 20x magnification and compared with a standard tooth profile. Surface roughness Ra ≤3.2μm; precision threads must achieve Ra ≤1.6μm. This can be measured on the side of the thread using a roughness tester. Common quality issues and solutions: If the pitch error is out of tolerance, check the machine tool drive chain clearance and adjust the pulley or servo motor parameters. If the tooth profile is asymmetrical, recalibrate the angle between the cutter head and the workpiece axis. If chatter marks appear on the surface, reduce the cutter head speed or increase the number of blades to reduce the cutting load on the individual cutters. For critical threads, go and no-go gauges are also inspected to ensure smooth insertion and a no-go gauge depth of no more than two threads, ensuring interchangeability. By strictly controlling process parameters and inspection steps, whirling milling can efficiently produce IT8-IT9 precision threads, meeting the quality and efficiency requirements of mass production.
